Install Wordpress on Ubuntu Server

by WebWays

288

Posted 01.04.2024

WordPress (WP) is a freely available and open-source content management system (CMS) crafted in PHP and designed to work alongside a MySQL or MariaDB database. It stands as the most widely adopted website creation platform globally, powering more than 38% of all websites on the internet. Installation of WordPress is straightforward and doesn't incur any costs, making it accessible to anyone aiming to build an appealing website.

To commence the installation of WordPress, you'll first require a web server, a database system, and PHP. In our tutorial, we'll utilize an Ubuntu Server 18.04 environment coupled with a MySQL database and PHP version 7.4. Once Apache and PHP have been successfully installed, we'll proceed with the subsequent steps.

Step 1 - Create a MySQL Database and an User for Wordpress

To access the MySQL root account, use the following command and enter the root password when prompted:

mysql -u root -p

After logging in, proceed to create a database for the WordPress installation. You can choose any name for the database; for this guide, we'll use the name "wordpress." Execute the following command to create the database:

mysql> CREATE DATABASE wordpress DEFAULT CHARACTER SET utf8 COLLATE utf8_unicode_ci;

Next, proceed to create a new MySQL user account that will be dedicated to managing the WordPress database. In our example, we'll name this user account wordpress_user, but you can choose any name that suits your preference. Use the following command to create the user account, set a password, and grant access to the WordPress database. Make sure to select a robust password for your database user:

mysql> GRANT ALL ON wordpress.* TO 'wordpress_user'@'localhost' IDENTIFIED BY 'password';

After setting up your WordPress database and user account, it's crucial to flush the privileges to ensure that the current instance of MySQL acknowledges the recent changes you've made:

mysql> FLUSH PRIVILEGES;

To exit from MySQL, simply type the following command:

mysql> EXIT;

Step 2 - Adjust Apache's Configuration

Next, we'll modify the Apache configuration. You should have a configuration file named 000-default.conf for your site located in the /etc/apache2/sites-available/ directory. Create a copy of this file named wordpress.conf in the same directory (/etc/apache2/sites-available/). For our demonstration, we'll set /var/www/html/wordpress as the root directory for our WordPress installation. Note that the use of .htaccess files is disabled by default, so adjustments need to be made in the configuration file to accommodate WordPress and its plugins that rely on .htaccess files.

Now, open the configuration file for your website:

sudo nano /etc/apache2/sites-available/wordpress.conf

To enable .htaccess files, you'll need to set the AllowOverride directive within the Directory block that specifies your document root. Add the following text block inside the VirtualHost block in your configuration file:

<Directory /var/www/html/wordpress/>
    AllowOverride All
</Directory>

Ensure to disable the 000-default.conf file and enable the wordpress.conf configuration file to apply the changes.

sudo a2dissite 000-default.conf
sudo a2ensite wordpress.conf

You can activate the Rewrite Module and restart Apache by entering the following command:

sudo a2enmod rewrite
sudo systemctl restart apache2

Step 3 - Install Additional PHP Extensions

WordPress and many of its plugins require specific PHP extensions to function properly. You can download and install some of the most commonly needed PHP extensions for WordPress using the following command:

sudo apt update
sudo apt-get install php-curl php-gd php-mbstring php-xml php-xmlrpc php-soap php-intl php-zip php-mysql

You can restart Apache again by entering the following command:

sudo systemctl restart apache2

Once completed, you are prepared to download and set up WordPress.

Step 4 - Download and Install Wordpress

The server configuration for WordPress is now complete, and you can proceed to download the latest version of WordPress.

Navigate to the /tmp directory, which should be writable, and download the compressed release using the following command:

cd /tmp
sudo curl -O https://wordpress.org/latest.tar.gz

Next, create the WordPress directory structure by extracting the contents of the compressed file.

sudo tar xzvf latest.tar.gz

The directory /tmp/wordpress will be created. Copy this directory into your document root.

sudo cp -a /tmp/wordpress/. /var/www/html/wordpress

Navigate to the directory /var/www/html/wordpress/ and create a .htaccess file for future use.

cd /var/www/html/wordpress/
sudo touch .htaccess

Additionally, copy the file /var/www/html/wordpress/wp-config-sample.php to /var/www/html/wordpress/wp-config.php.

sudo cp wp-config-sample.php wp-config.php

Step 5 - Configure the Wordpress Directory

Now, edit the /var/www/html/wordpress/wp-config.php file. Modify the DB_NAME, DB_USER, and DB_PASSWORD values accordingly. Additionally, add the FS_METHOD configuration at the end of the file.

. . .
. . .

define('DB_NAME', 'wordpress');

/** MySQL database username */
define('DB_USER', 'wordpress_user');

/** MySQL database password */
define('DB_PASSWORD', 'password');

. . .
. . .
define('FS_METHOD', 'direct');

Apache needs to have read and write permissions on WordPress files to serve the website correctly. Therefore, we should change the ownership of all WordPress files to the www-data user and group, which is the user that the Apache web server runs as.

sudo chown -R www-data:www-data /var/www/html/wordpress
sudo find /var/www/html/wordpress/ -type d -exec chmod 750 {} \;
sudo find /var/www/html/wordpress/ -type f -exec chmod 640 {} \;

Step 6 - Minimum PHP Settings

To adjust PHP settings, locate the php.ini file at /etc/php/7.4/apache2/php.ini (or the appropriate path if using a different PHP version). Open the file using the nano command and modify the following values:

upload_max_filesize = 32M
post_max_size = 48M
memory_limit = 256M
max_execution_time = 600
max_input_vars = 1000
max_input_time = 400

Don't forget to restart Apache after making changes to the php.ini file:

sudo service apache2 restart

Step 7 - Complete the Wordpress Installation on the Web Interface

You can access your WordPress installation using either the domain name or the public IP address.

Now proceed with the setup using the web interface.

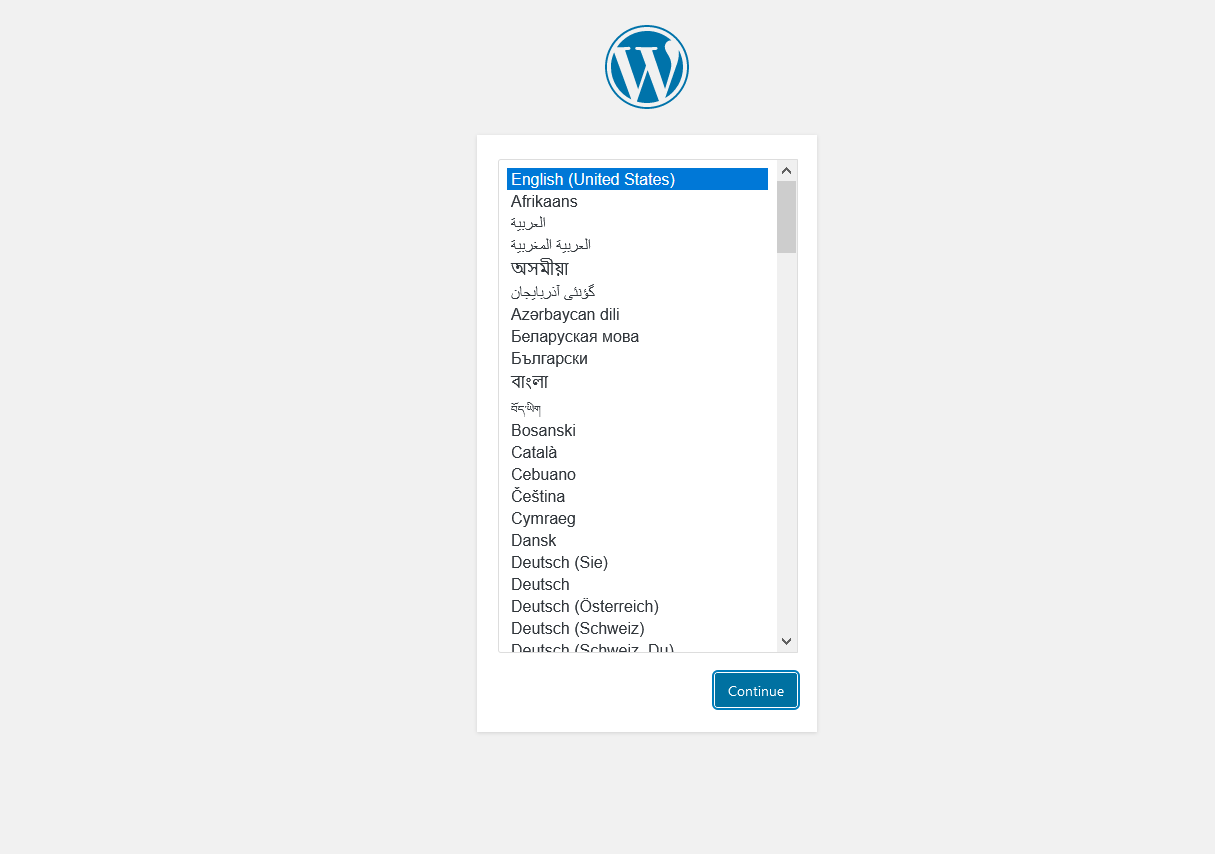
Choose your preferred language during the setup process.

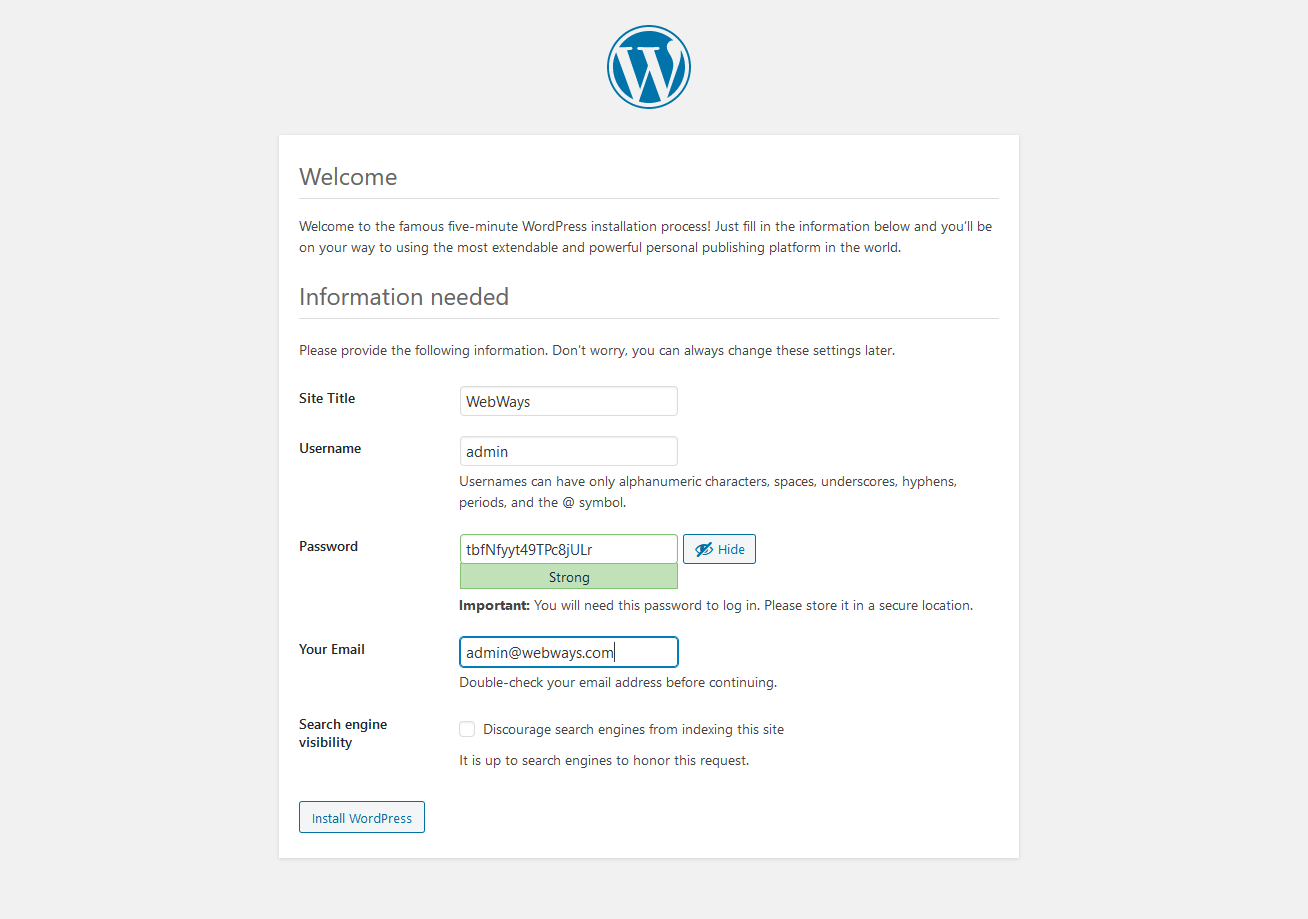
Provide a title for your website, choose a username and password, enter your email address, and then click the "Install WordPress" button.

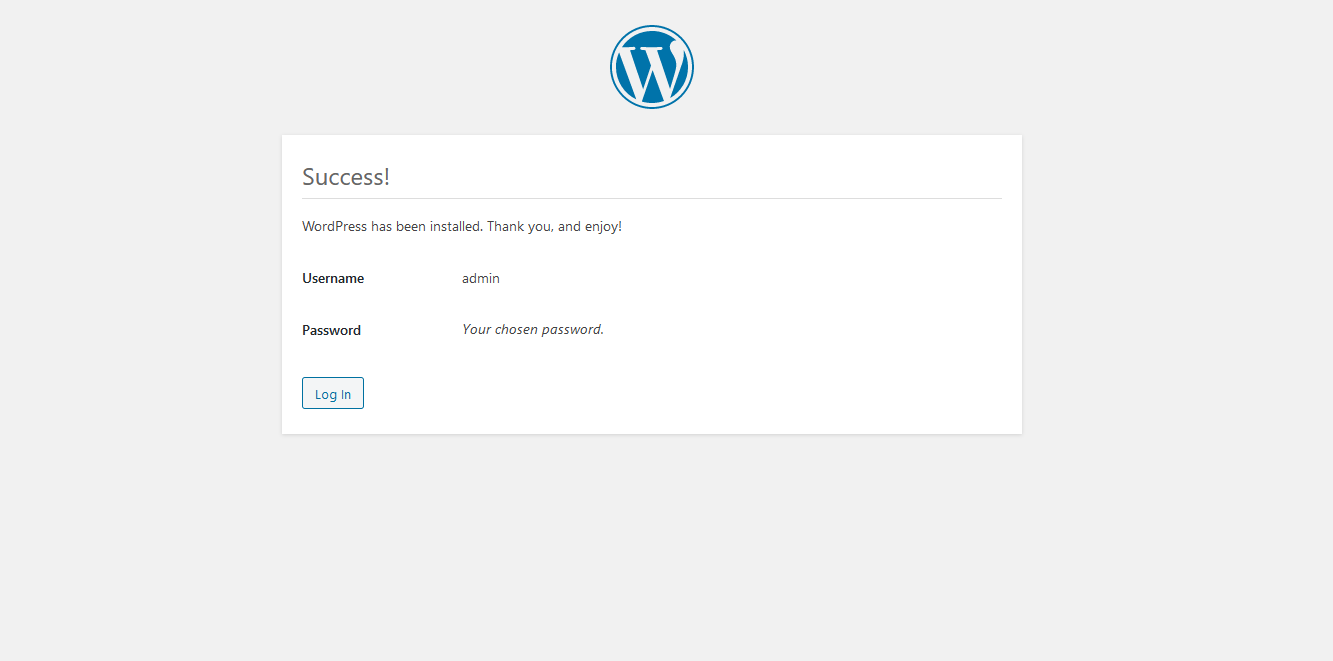
WordPress has been successfully installed. You can now proceed to log in.

Share on social media

Comments

Leave your comment


*By submitting this form, I confirm that I have read GDPR Policies and give consent to contact me.

MOST VIEWED POSTS

Integrating Chart.js into Laravel 11
How to reset WordPress Admin Password on Localhost
How to Integrate Vue.js with Laravel: A Step-by-Step Guide
Install Wordpress on Ubuntu Server
How to add Validation Rules in Laravel
How to Schedule Posts in Laravel

RANDOM POSTS

How to reset WordPress Admin Password on Localhost
Install Wordpress on Ubuntu Server
How to Integrate Vue.js with Laravel: A Step-by-Step Guide
Integrating Chart.js into Laravel 11
Building Laravel UI with Blade Components
How to Schedule Posts in Laravel